Unit tests for 3D
How a verification harness made my first print fit
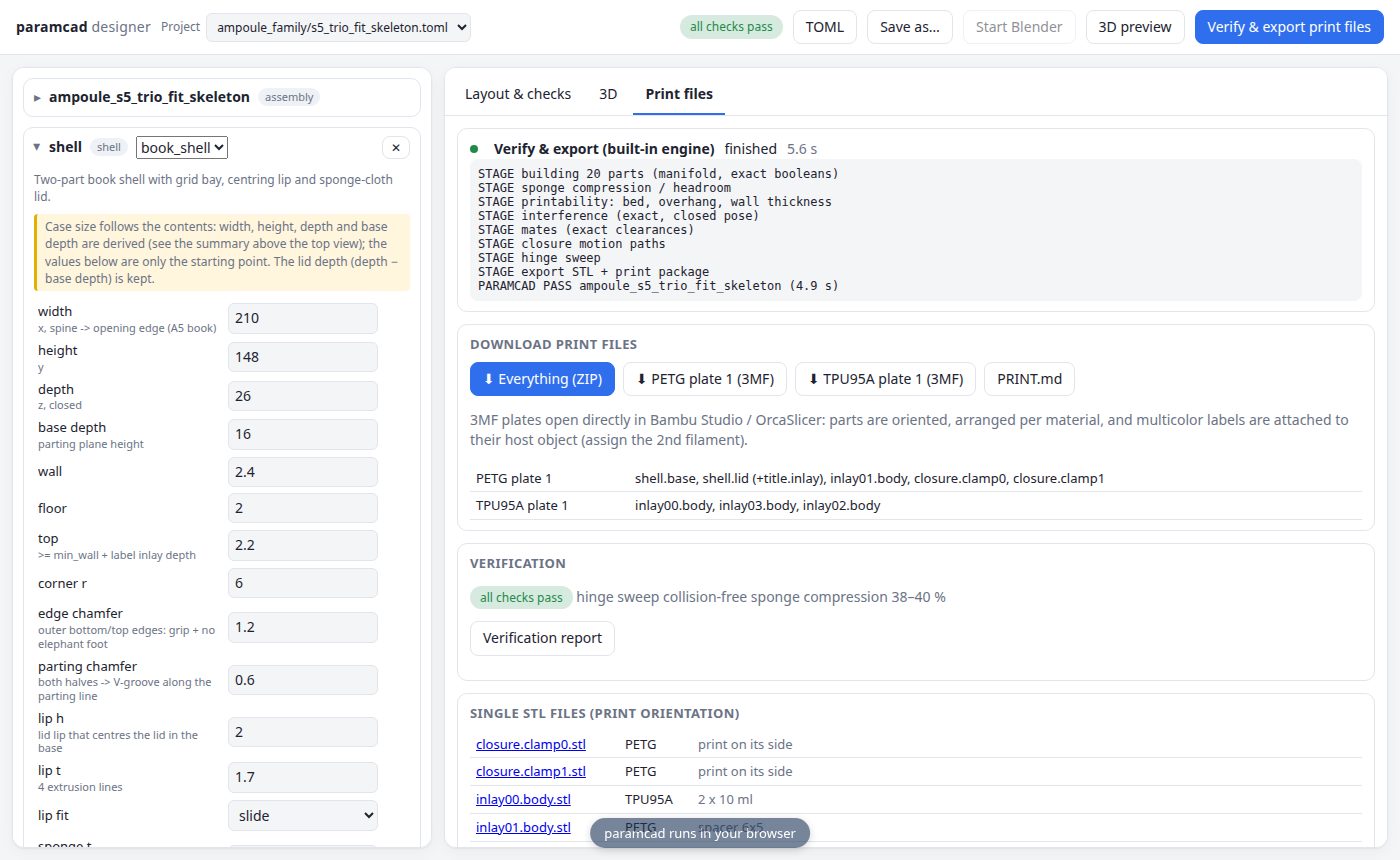
I wanted to 3D-print an ampoule case for my wife, and it fit on the first print. The trick was not the CAD. A verification harness checked every design virtually before the printer saw it. You choose which ampoules and how many; the generator either packs them into a fixed case or designs the smallest case that holds them.
Try it: paramcad designer, which runs entirely in your browser.
From CAD to print
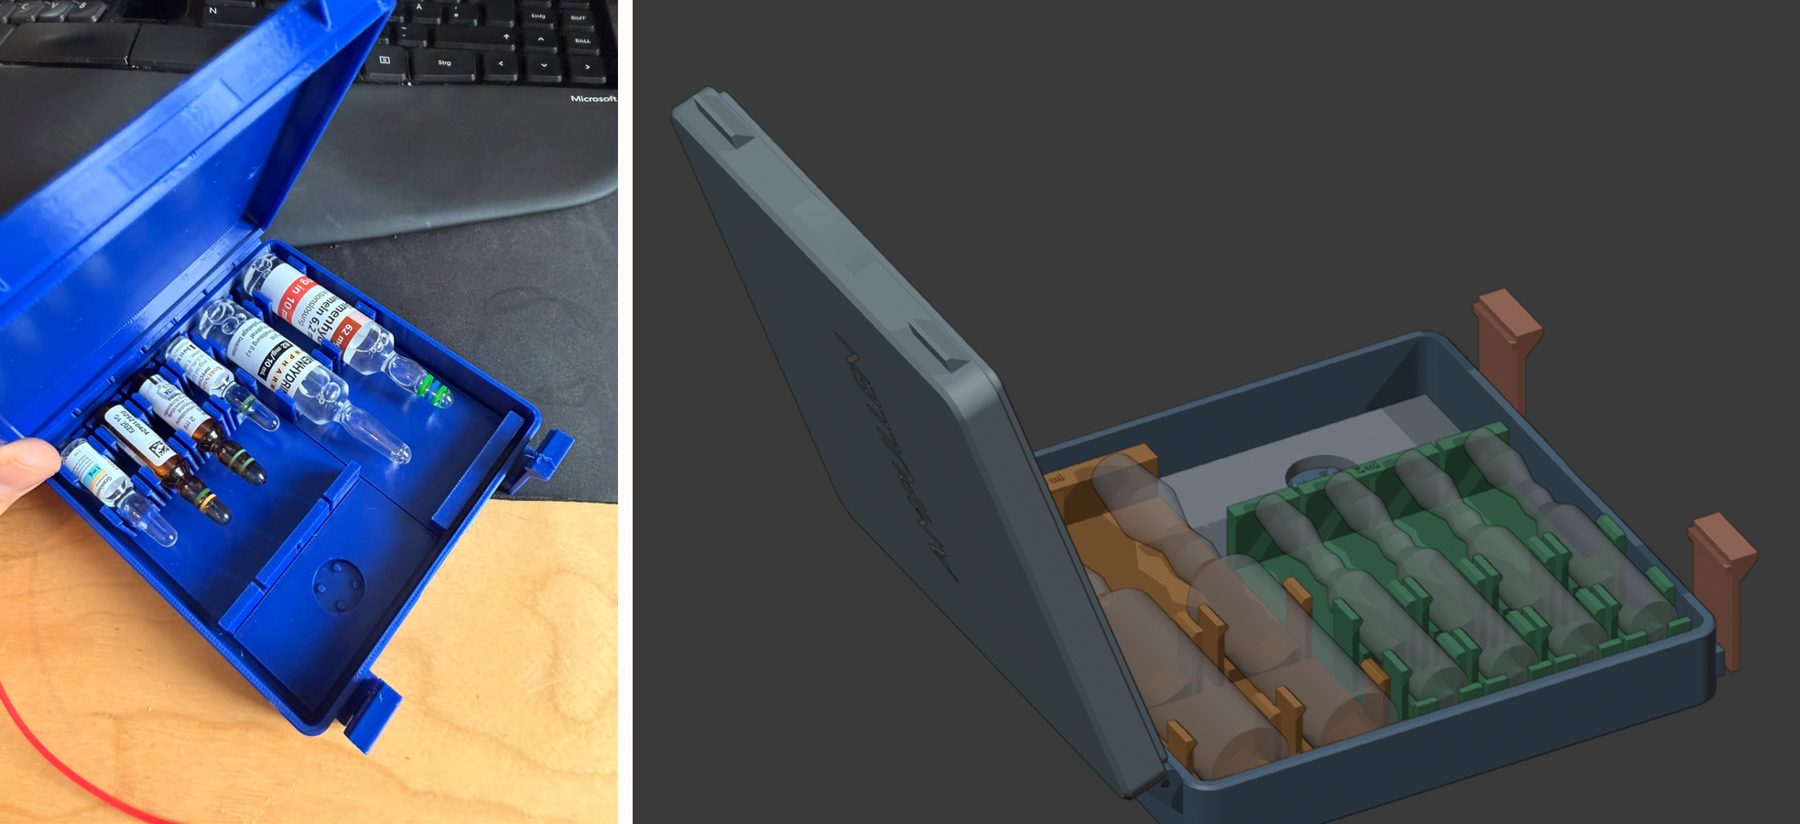
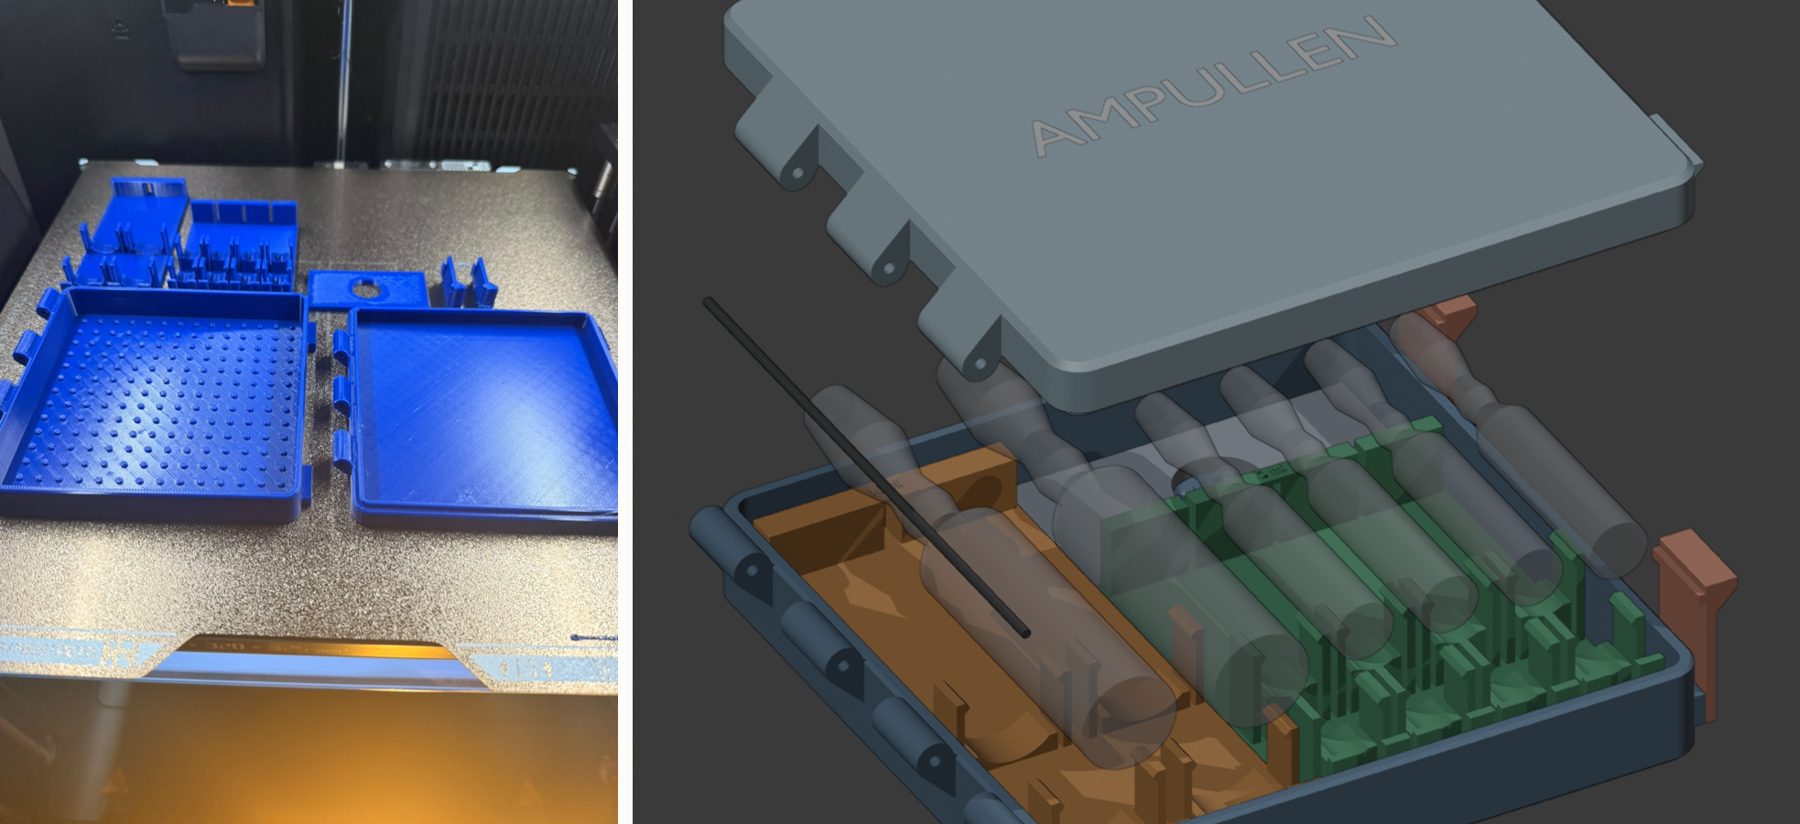
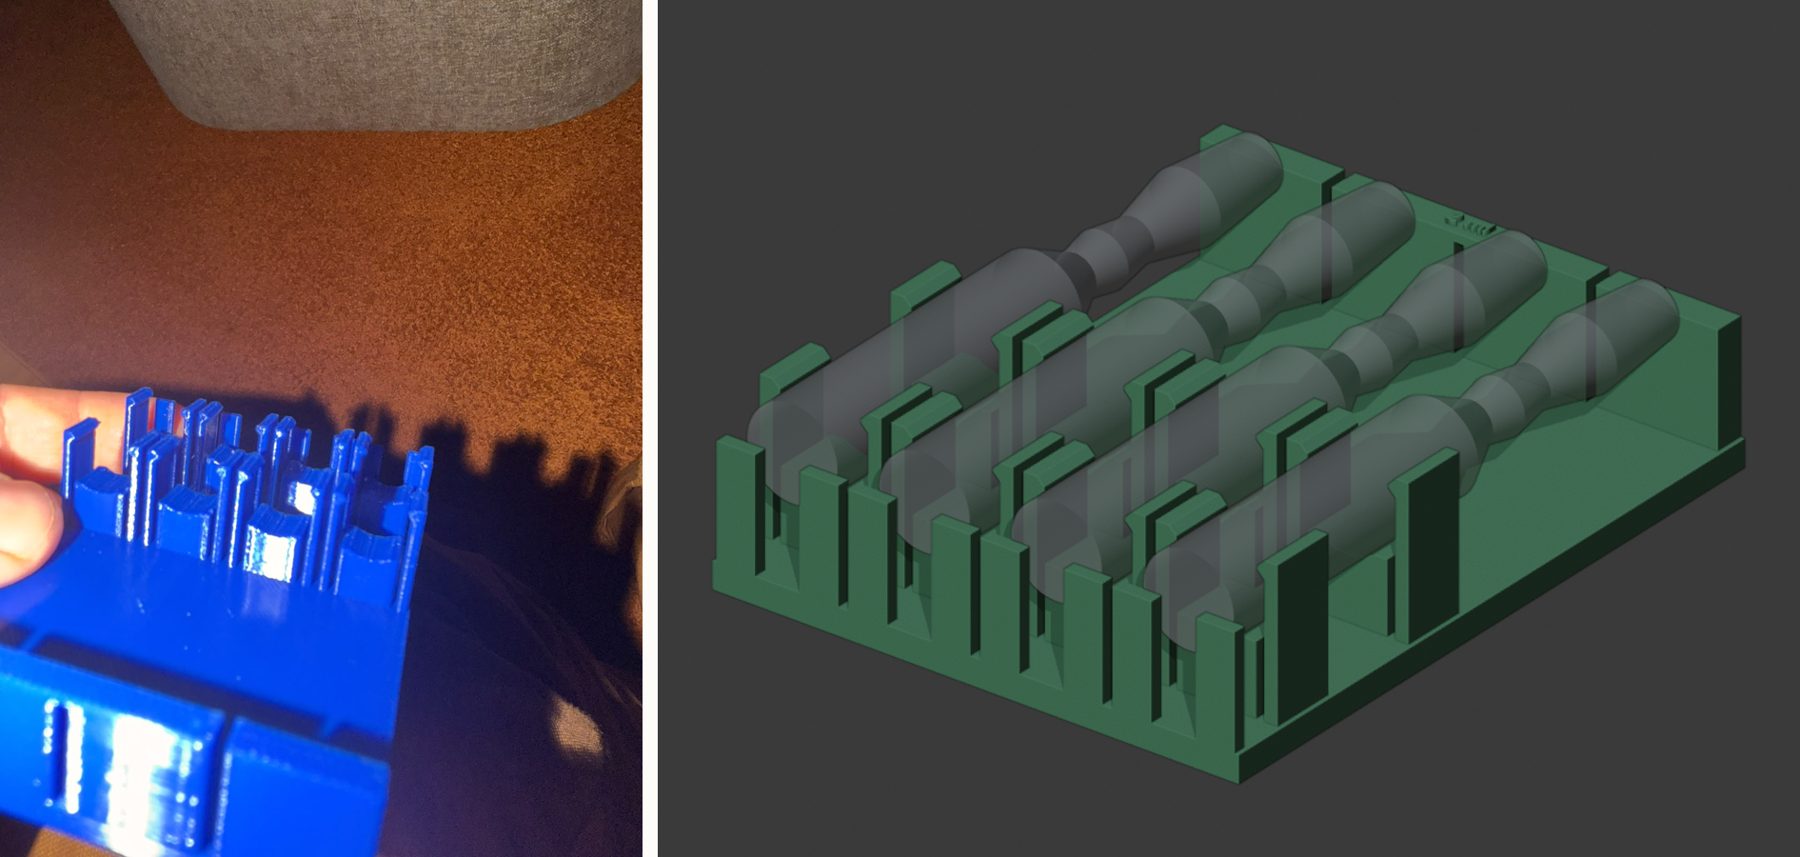
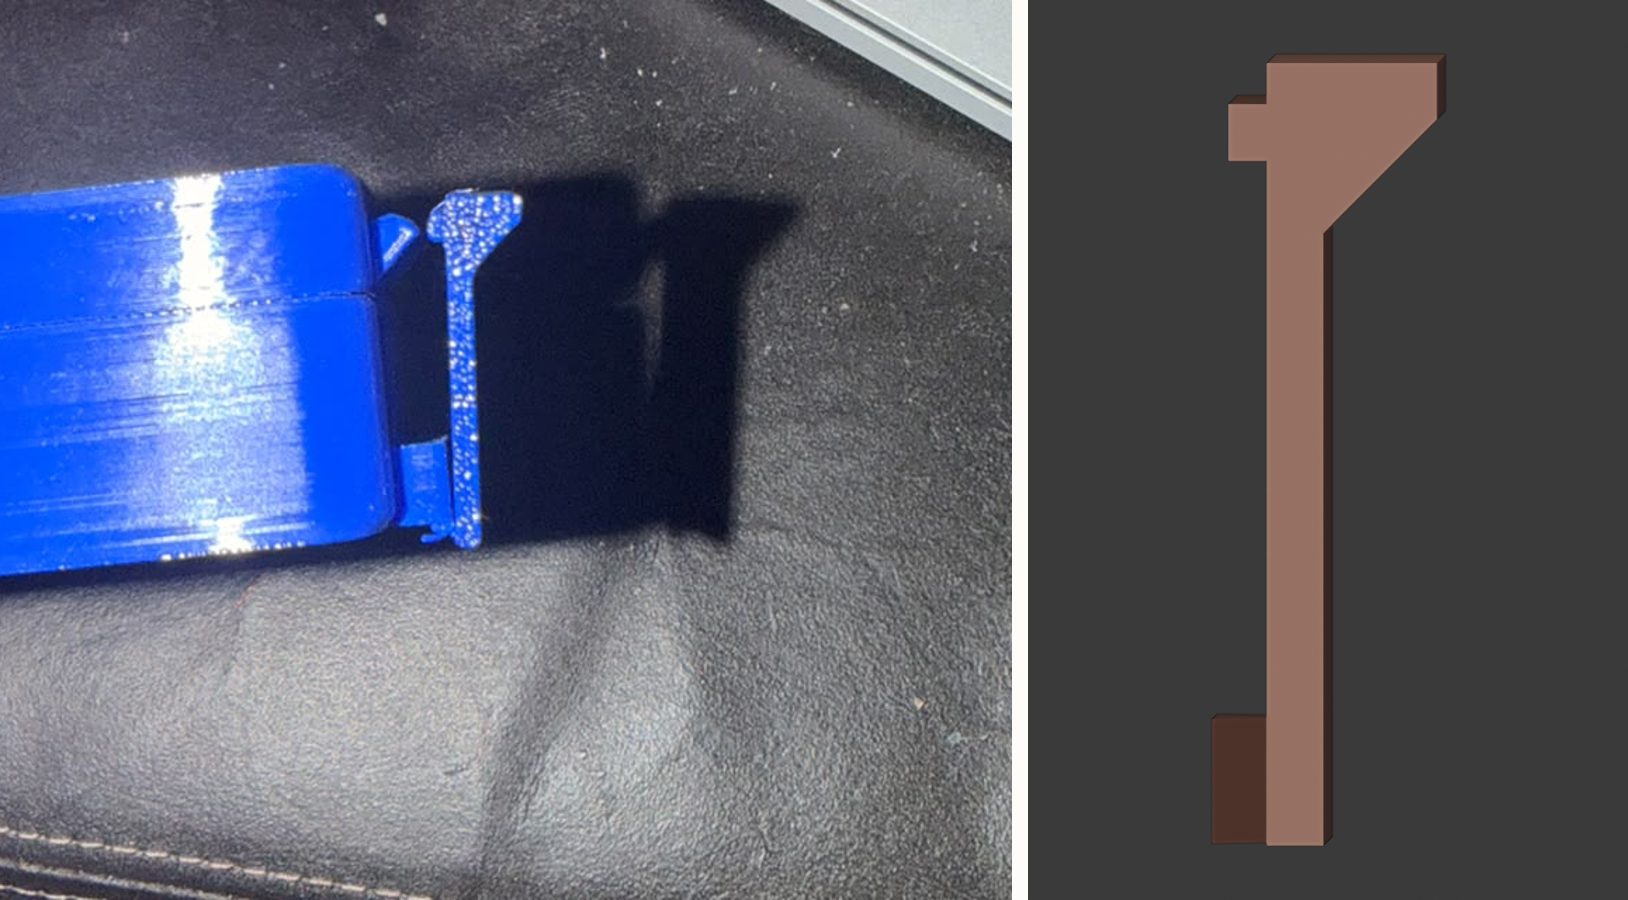
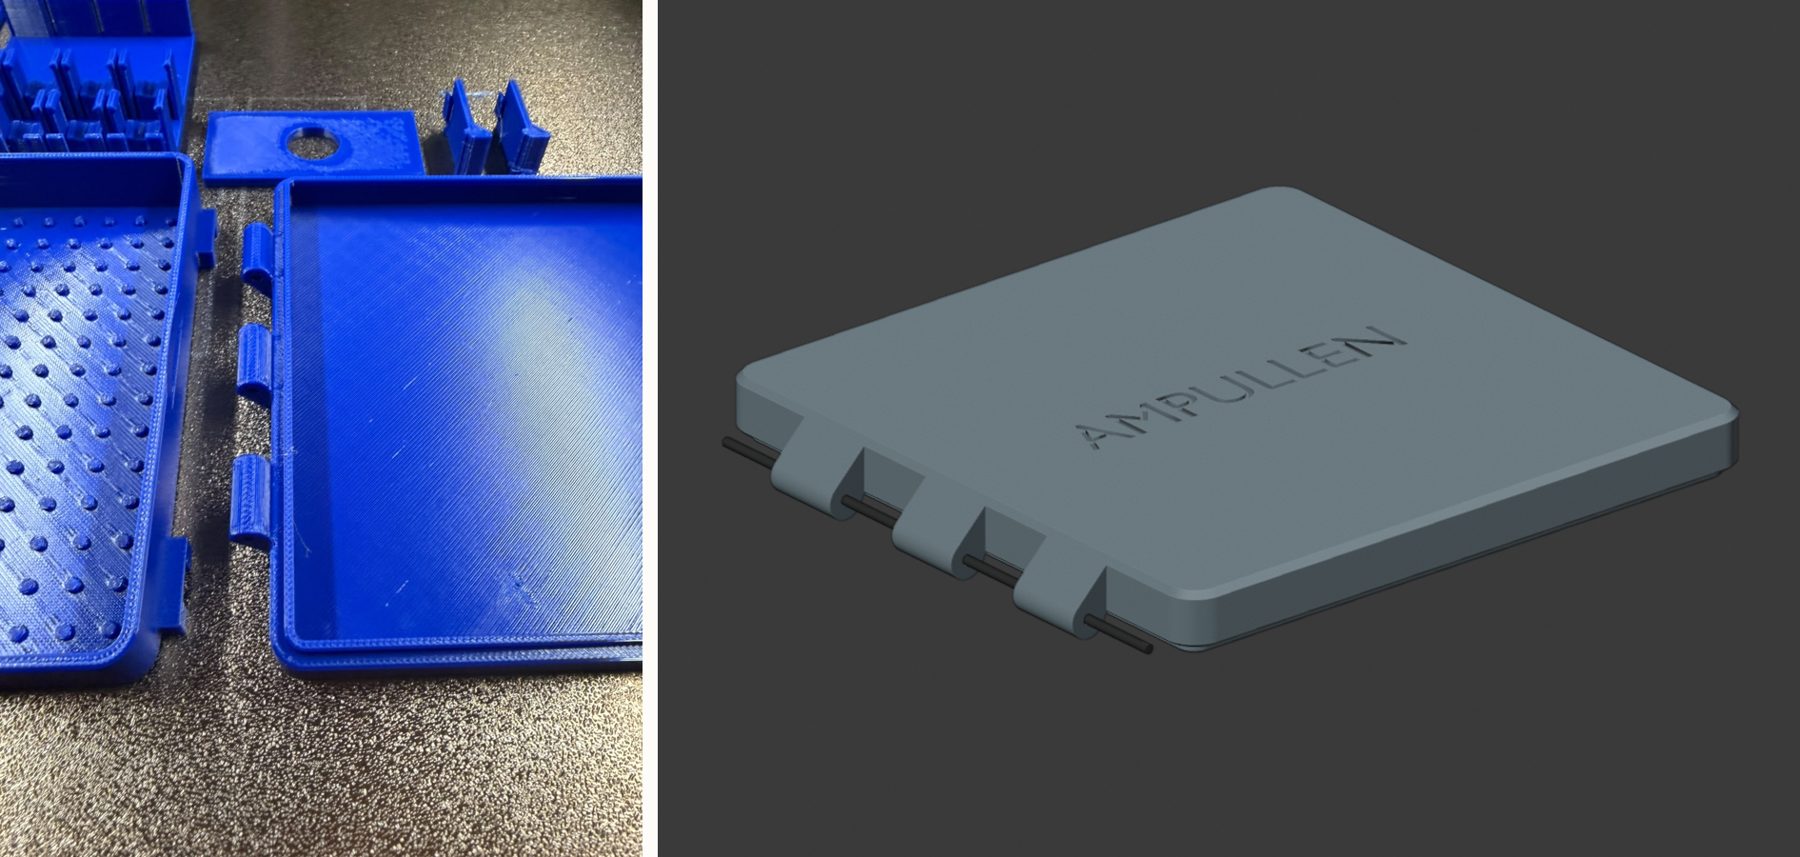
The printed case is the fork-clip version: two 10 ml and four 2 ml ampoules in a 121.5 × 121.5 mm PETG case. It went together on the first print. Only the closing clamps and the clips showed small deviations, which is exactly what the outer loop below turns into calibration data and new rules.
The harness: unit tests for 3D
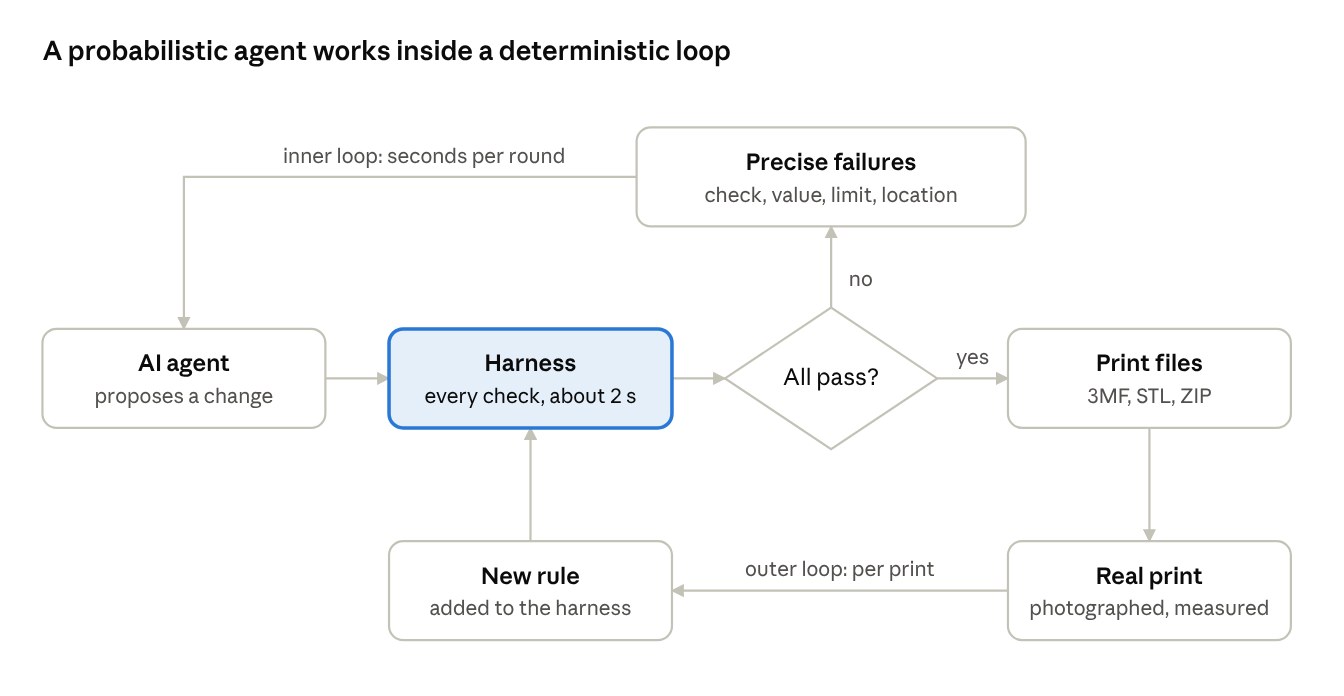
Think unit tests, but for geometry: collisions, the lid’s movement, heights, wall thickness and fit. Rule by rule, it grew until it could tell virtually whether the real part would work.
The loop
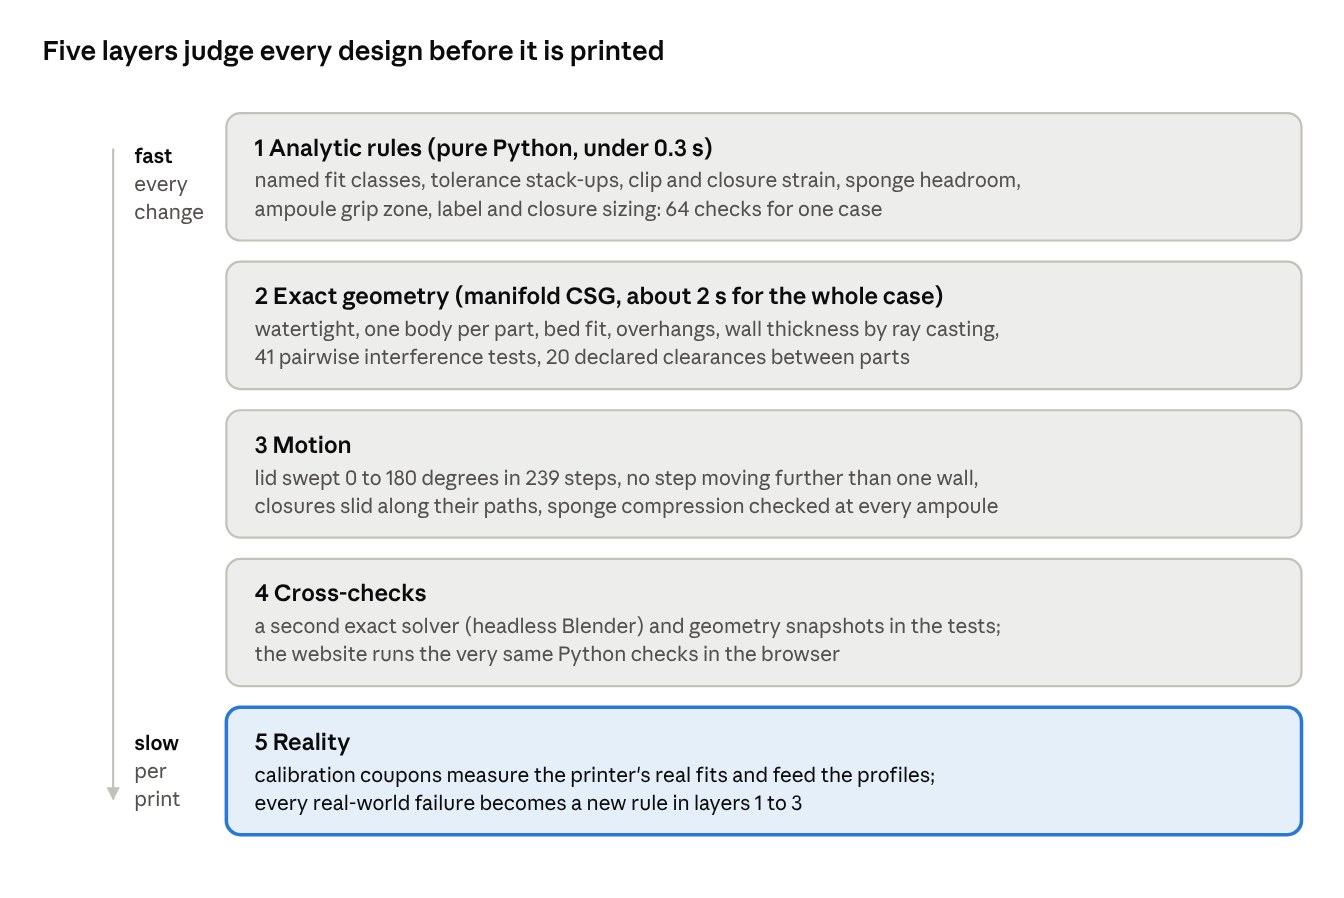
The agents never had to guess. A full check takes about 2 seconds and names the failed check, the value, the limit and the location. So they could iterate many times before anything was printed. The outer loop is the real print: photographed, measured, compared with the CAD.
Every failure became a rule
| What went wrong | Rule now in the harness |
|---|---|
| A clip sat on the ampoule’s fragile neck. | Holders may only touch the straight body. |
| The lid jumped through a latched clamp between two motion steps. | No step may move a part more than one wall thickness. |
| Lightening windows left floating islands, each one watertight. | Every printed part must be exactly one body. |
Beyond classic unit tests
Unit tests are only the start. Here the harness also renders the model, animates the motion and compares photos of the real print with the CAD. In bigger systems the same thinking means installing the product on fresh virtual machines in the build pipeline and running complete scenarios as smoke tests, plus long-running and hardware-in-the-loop tests.
I list every technique I can think of, then keep the ones that earn trust. It’s a trade-off: stay virtual and fast as long as possible, and go real and slow only where reality alone can answer. Whatever is kept must be deterministic and trustworthy.
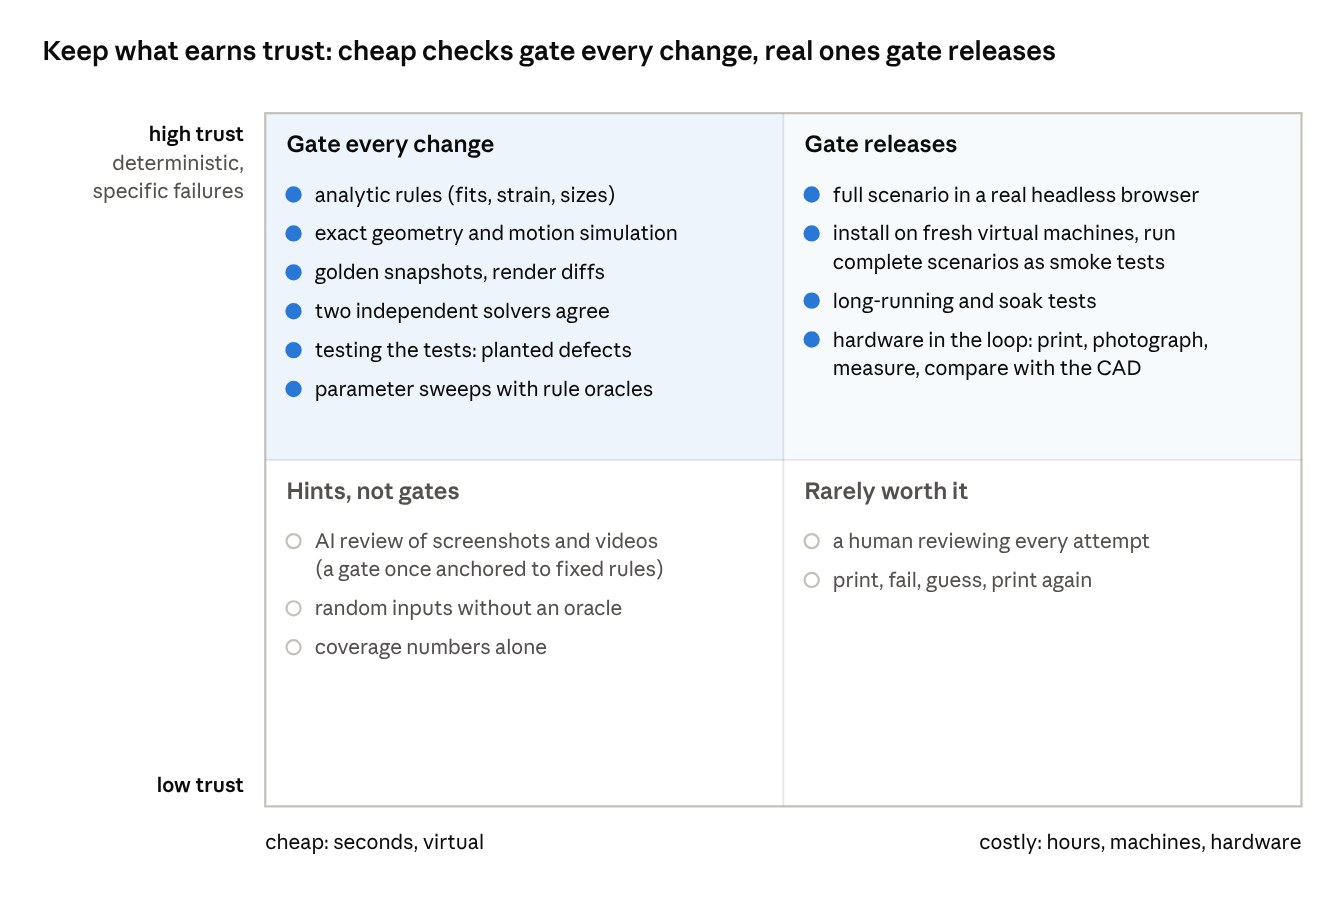
Two habits keep this manageable. First, be systematic inside the tests themselves: each check is a module, declared next to the part it protects and run by one generic runner. Second, test the tests: the checker is fed parts with planted defects (an overlap, a thin wall, an open mesh) and must find every one. Look at the whole creation process, not only the code: inputs, generation, verification, packaging, the print and the photo of the print.
Harness engineering
At its core this is just TDD. The hard part with agents is making the validation fast, complete, automatic and virtual. I often spend more time on the harness than on the implementation, which then becomes almost trivial.
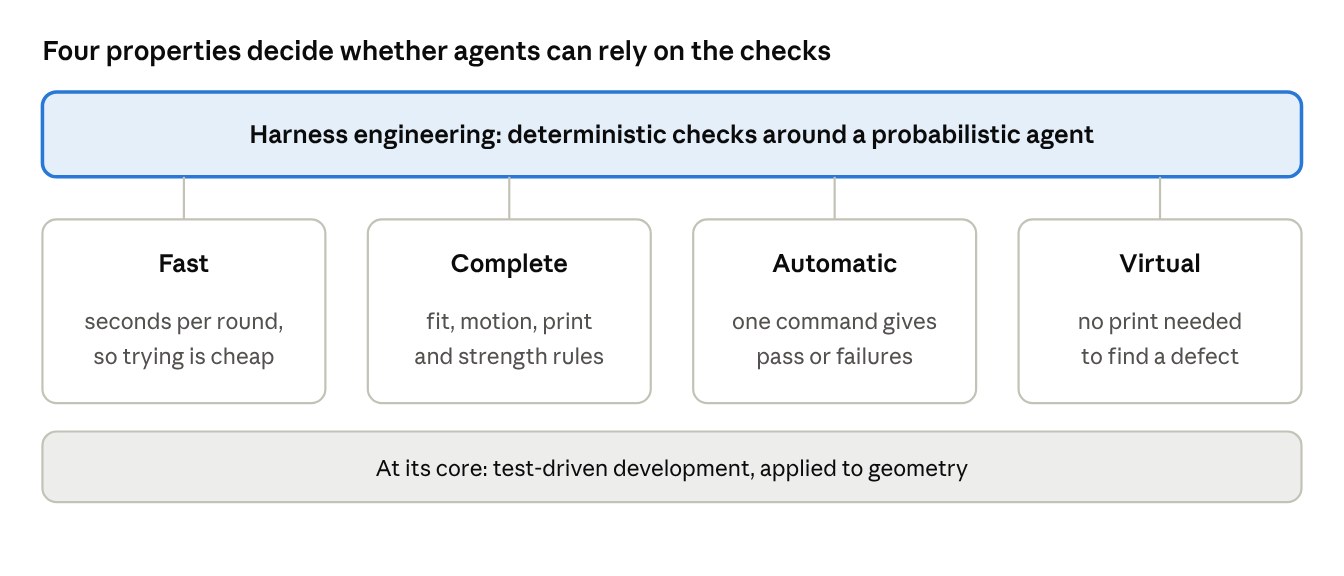
The literature calls this harness engineering: deterministic, reliable flows around a probabilistic agent, to harness its power.
Beyond 3D printing
The recipe transfers to any agent task:
- Define “done” as checks a machine can run, before the agent starts: tests for code, schema and consistency rules for data, rule-based checks for documents.
- Make every failure specific: what failed, where, and by how much. That is what the agent iterates on.
- Keep the checks as fast and virtual as possible, then add long-running, hardware-in-the-loop and full-install tests where only reality can answer. Whatever you keep must stay deterministic and trustworthy, and the tests themselves need testing.
- Turn every escaped defect into a new check, so the same mistake can’t come back.
- Review the harness, not every attempt.
This was a small project, and I didn’t give maintainability much thought. Still, the same principles hold for me at every scale.